|
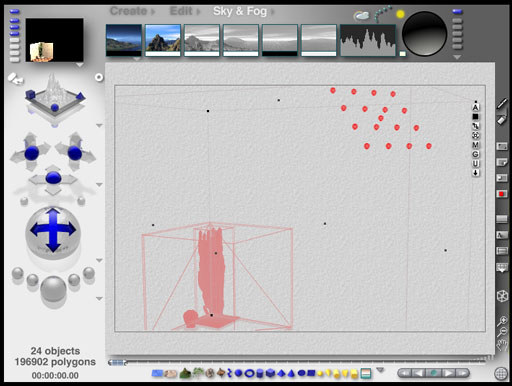
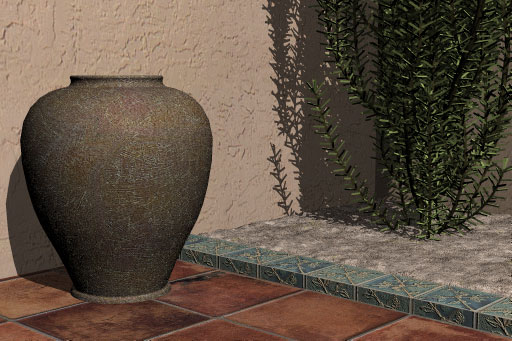
Some basic geometry as it was imported from Rhino. I've scaled the entire model 1,500%, named each object, grouped similar objects and turned off most of the atmosphere as well as the sun. The scene is illuminated by a single omni light.
|
I've always admired the rich textures Peppe Tannemyr uses in his images but never had much success with the technique before now. Image mapped textures can add a great deal of realism to an image but can also be a little tricky to work with at times. They render very quickly and also work well as an alternative to complicated models for architectural objects.
Here are a few basics to help you get started.
A wide variety of high quality image textures textures are available on the web. You'll also find textures included on the Bryce content CD. If you have a digital camera it's also a simple matter to make your own textures or generate them from Bryce or other software packages.
Free
Commercial
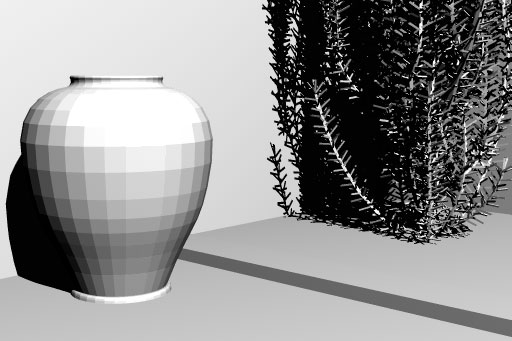
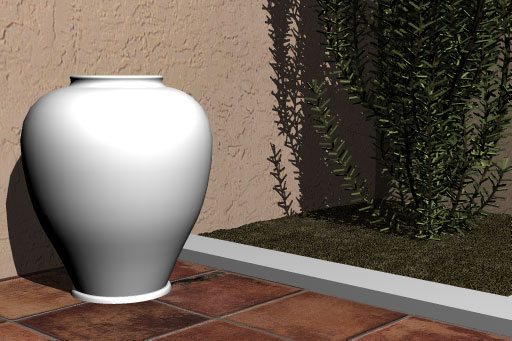
Let's start with some simple geometry. Select or build models that are fairly accurate (accurate doesn't necessarily mean high polygon count) because they're foundation for your textures. Low quality models can sometimes create unwanted visual defects in the final image.
|
Some basic geometry as it was imported from Rhino. I've scaled the entire model 1,500%, named each object, grouped similar objects and turned off most of the atmosphere as well as the sun. The scene is illuminated by a single omni light.
|
When you're using image mapped textures you don't generally need complicated geometry. The walls, floor, urn and border aren't very complicated so later, I'll add a fairly complicated texture. The taxus baccata already has a pretty complicated geometry so I'll keep it's texture simple. Balance the complexity of the texture with the complexity of the geometry for a uniform result.
One of my favorite features in Bryce is it's ability to change one type of object into another. I can already see that the ground under the taxus baccata isn't showing up very well so I'm going to convert it to a Bryce terrain. I do that by selecting the surface, and clicking on the word Edit at the top. Click and drag over the arrows at the upper right corner of the interface to open the "Convert Selection To ..." fly-out menu. Release the mouse button over the type of object you want and Bryce will convert the selected object to that type.

I also want the feel of global illumination in the final image so I modeled an array of 17 spheres arranged in a 4 x 4 grid with one additional sphere in the center of the grid. After I imported the model, I selected the spheres and converted them to omni lights because it's much easier to accurately position objects in Rhino than it is in Bryce. I used the same method as above.
|
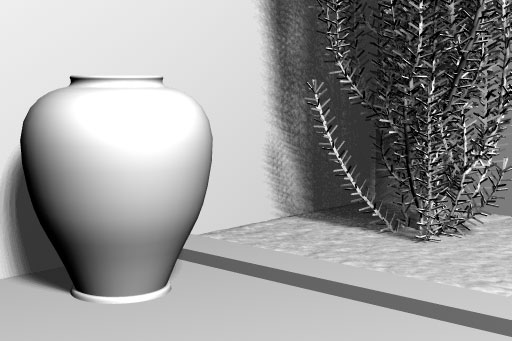
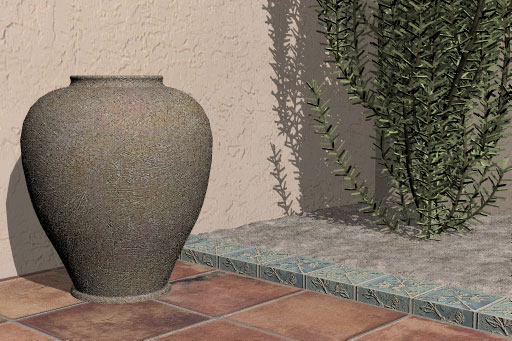
The same scene after applying smoothing to the meshes. I've also turned on the light array and reduced the shadow intensity to 50% to give the illusion of radiant light. Since there are 17 lights in the array now I've set the intensity of each to 1/17th the intensity of the original light. This is already giving a nice tonal and shadow balance. I can add soft shadows to the lights later if the effect isn't smooth enough. The wall texture will tend to disburse the discrete shadows so I'm not going to worry about it right now. I want the scene to render quickly while I'm working with the textures so I'll turn the light array off again. If you want to learn more about lighting in Bryce look at the description under Ed 'n Mac and also the Lighting Reference tutorial. |
This feels like a Mediterranean garden. So, for the textures, I'm thinking I'll want stucco walls, stone tile floor, tile border and something interesting on the urn.
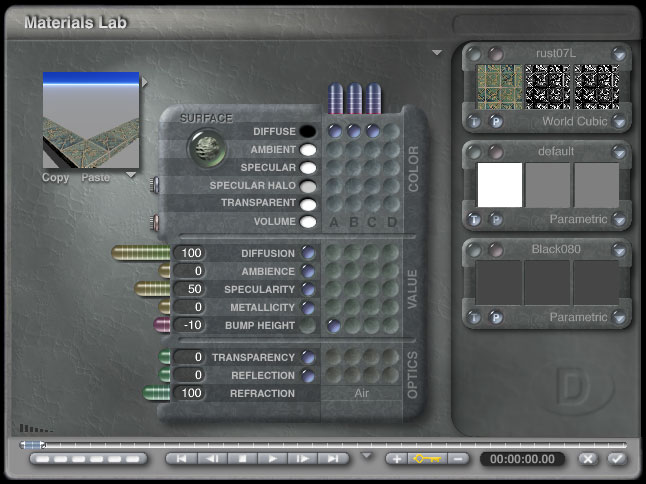
I tend to start with the most visually dominant elements in the scene. In this case that will be the wall, floor and ground textures. I may apply the same texture to several objects of different sizes so I'll use World Cubic mapping to make sure that the textures are scaled consistently on the X, Y and Z axes as well as between objects.
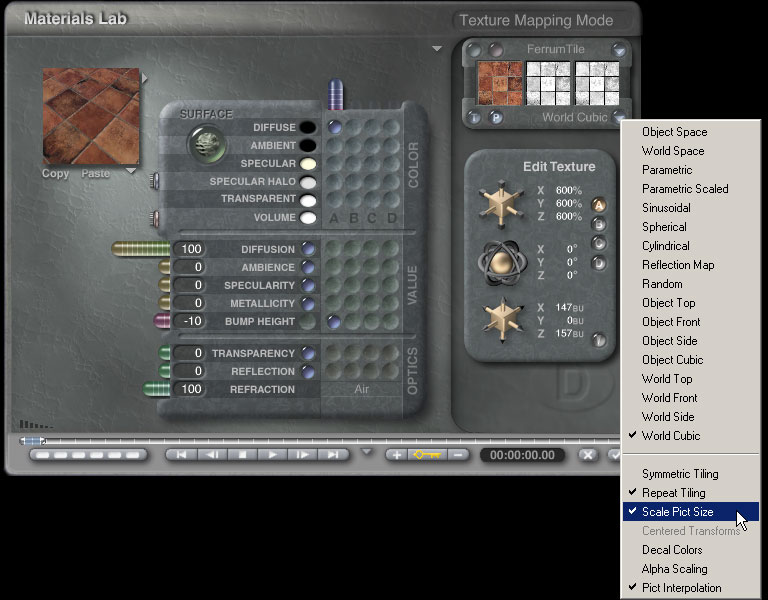
I've loaded the image texture and bump maps into the A component and assigned them to the diffusion and bump channels. In world cubic mapping mode it is essential to set "Scale Pict Size". With that set, think of the texture scale like a magnification. The higher the percentage, the closer you zoom in on the texture and the larger it appears on the object. If you don't have "Scale Pict Size" set the scale works in the opposite direction but there is a limit which may cause you problems depending on the size of the original texture.
|
This texture is seamless so I'm using "Repeat Tiling". If your texture isn't seamless, you'll use "Symmetric Tiling". The border is six inches wide so I'm going to eyeball the scale of the floor to about twice that, and align the texture to the border object. With the floor and border objects selected I can use the top view in solo mode to make it easier to align the floor texture. |
I've quickly repeated the same process for the walls and ground. I've also assigned basic color materials to the branches and needles. I'm going to let the light and shadows vary the color on those. This is starting to look like what I'm after.
To layer two textures you need to create an ABC material. Click the A texture in the diffuse channel then ctrl-click the B and C textures.
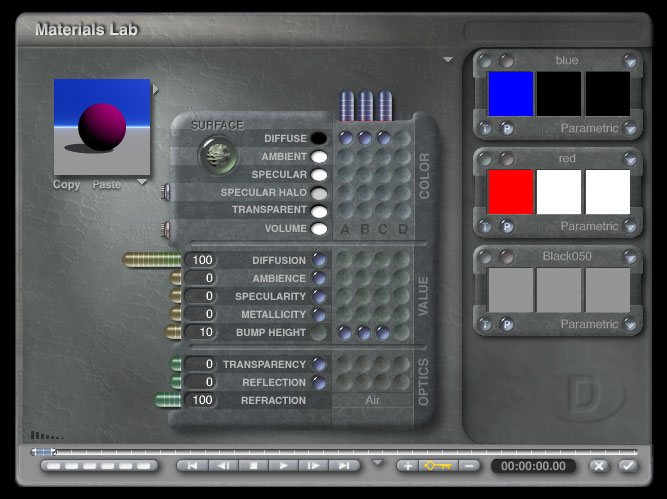
The A and B textures provide the color and bump information while the C texture's alpha value controls the blend between the two. The color information of the C texture is ignored. Making the alpha value darker increases the strength of the A texture, a lighter alpha value making it lighter makes the B texture stronger.
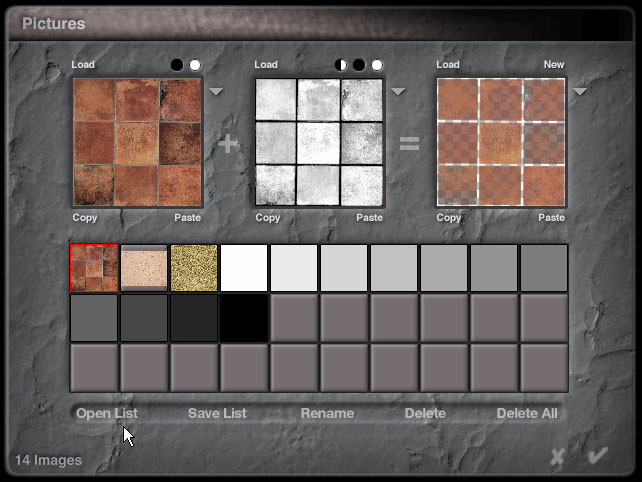
Unfortunately there doesn't appear to be an easy way to set a simple value to the alpha channel of a texture. I created a series of small swatches to make it easier to assign the alpha value. You can download the swatches here or by clicking on the image above. Open the "Pictures" dialog and click "Open List" to load the swatches.
There isn't anything that says both A and B textures have to be image maps. While procedural DTE components won't let you assign an alpha value directly, they can be useful in other ways.
The mapping mode and scale of the A and B textures are independent so you've got a lot of flexibility.
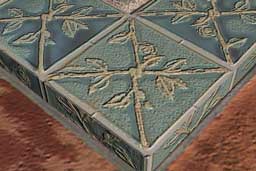
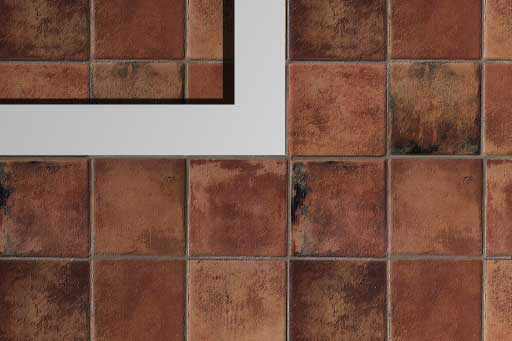
The sharp edges on the border would normally be a problem but I had in mind to use a tile texture. The texture I liked was a little dark for the scene so I blended it with a procedural to lighten it. You could get the same effect by adjusting the original bitmap but it's more convenient to do it this way and my original bitmap stays untouched. I've also added some specularity.
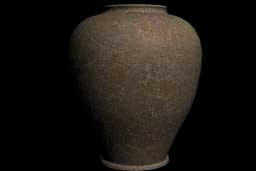
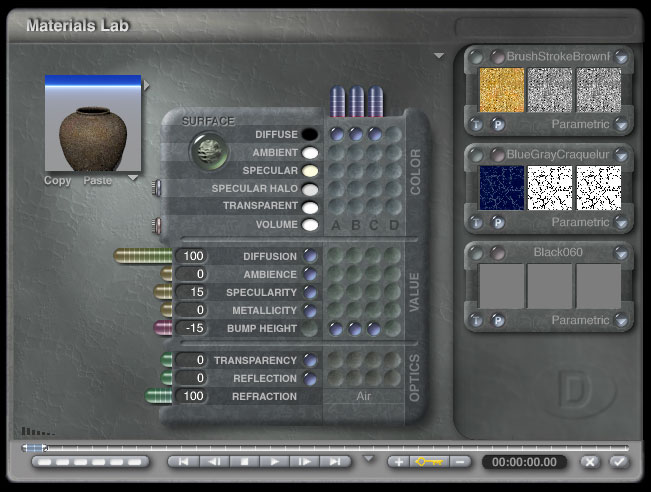
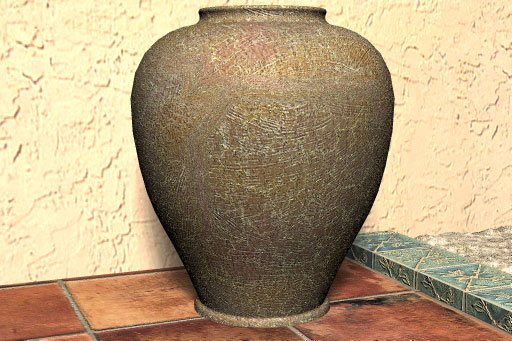
Though I like world cubic mapping for architectural objects, parametric is a better choice for isolated objects. Here layering the texture brings out interesting texture details while softening two fairly extreme overall colors. I've also used different scales on each texture.
Here's what we've got so far. Not bad but not quite finished. Remember, this is supposed to be a Mediterranean garden scene so I chose textures that supported that feel.
I'm not generally a fan of gamma correction but in this scene I'm not using any of Bryce's atmosphere settings so I'll turn it on to make it feel more like an outdoor scene. I'm still using normal render mode.
Now I can go back and balance out the materials and the shadows. If a material is too light, I can decrease the diffusion. If it's too dark, I need to increase the light and adjust the diffusion of the other objects down.
Send questions and comments to toad@castironflamingo.com.
Copyright © 2002 - CJC, all rights reserved