|
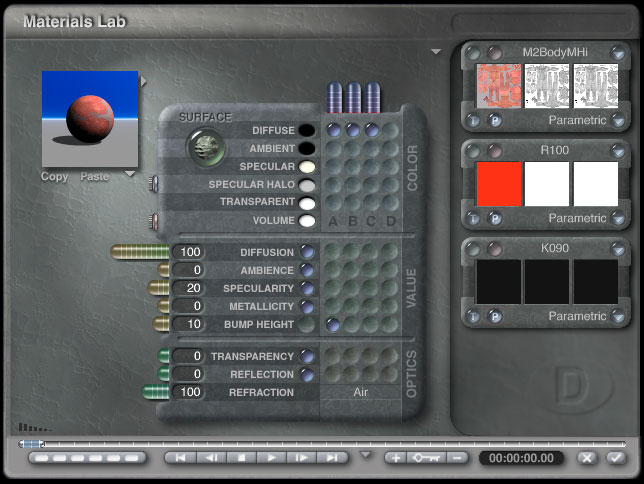
OverviewIf you are rendering Poser figures in Bryce you'll sometimes want to make adjustments to the hue or color of the maps. Texture maps from different sources can vary and you may want to make subtle adjustments without destroying the underlying detail. I'm going to use the idea of adding sunburn to a figure but the technique applies just as well to any situation where you want to adjust the skin tone. The most obvious way to adjust the skin tone of a map would be to simply edit the map in a paint program. At best you'll waste a lot of time and space. At worst, you'll forget (as I'm likely to do) and overwrite the original map. You also have to mask off certain areas, like the eyes, before you adjust the map. Fortunately there is an easier way to handle this in Bryce. ABC MaterialsIn Bryce, ABC materials allow you to specify two different sources for diffuse color (A & B components). The blend between the two is controlled by the alpha channel of the C component.
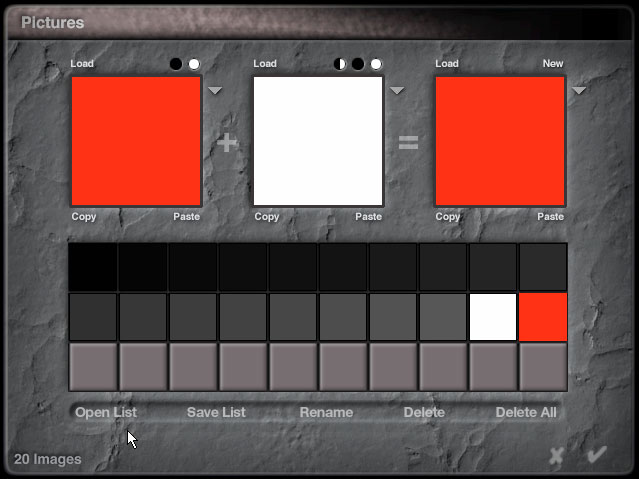
Here I selected the SkinBody material and blended the figure's map with a solid red color. The alpha channel is 90% black so I get 90% map (A component) and 10% solid red (B component). I don't have to worry about the eyes or any other of the figure's parts becoming red because those are separate materials. I'll apply the same B and C components to the SkinHead material. Note that I'm using image maps for the A, B and C components. Alpha ChannelsAn unfortunate oversight in the Bryce material model is that you can't conveniently set the value of the alpha channel for the C component. The easiest way to do this is to create a small image map with the desired value. Since I'm not sure of the exact alpha value I'll need for any given texture map I created a series of 16x16 maps and saved them as a list.
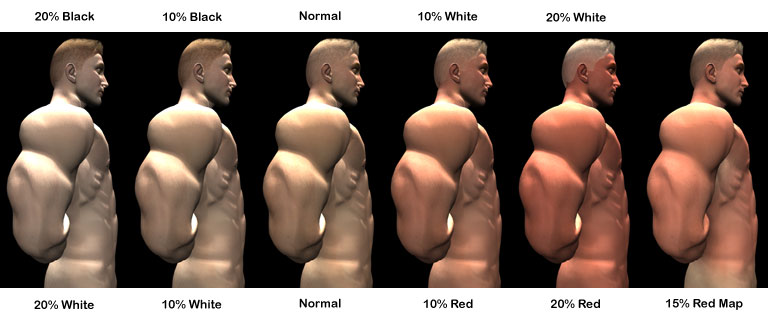
You can download the list here. The first 18 swatches are alpha values in 2% increments for the C component. The last two are solid colors for the B component. There is a similar set in 20% increments here. VariationsBy adjusting the SkinBody, SkinHead and hair maps with ABC materials, I can quickly get a variety of useful results. Here I'm looking for a suntanned effect so as I increase the blend of red on the SkinHead and SkinBody maps, I'm also blending the hair with white for a bleached effect.
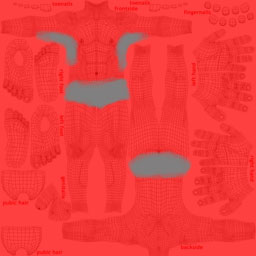
From left to right I'm adjusting the hue of the map without losing any of the detail. For a clothed figure at a distance, or for adjusting maps for ethnicity this technique works fine. In the last image in this series I applied an image map instead of a solid color in the B component for a more realistic tan line effect. Tan LinesIn real life people don't tan evenly, except of course in the gym. Normally, the sides of the body under the arms and areas covered by clothing will be less tanned than more exposed areas. Certain areas of the face will also tan differently. Adjusting the overall hue of a map won't give you a natural looking result on a nude or semi-nude figure. For these situations you need to go back to the template that was supplied with the model. To create a tan line map, start by loading the template for the model in your favorite paint program. I like Photoshop so ...
I've left the red layer slightly transparent so that you can see where I've painted. Your finished map should be either solid red or grey where you've painted. Apply the finished map to the B component in place of the solid red. I'm really bad with a brush and the nice thing about this method is that you can be fairly sloppy on the tan line map and still get a good result. Have fun! Questions and comments to toad@castironflamingo.com |
|
Copyright © 2000 - CJC, all rights reserved |