|
|||||||||||||||||||||||||||||||||||||||||||||
Setting up the model in PoserI'm going to be using a character based on Michael 2.0, Neftis' Yan hair and DAZ's free shorts for Michael. I'm deliberately using the Yan hair because it looks great but it's also one of the most difficult props I can think of to map correctly. If you can follow me on this one, everything else will be easy. Setup the figure and pose in Poser and export it to an OBJ file. I used the default settings for all the export dialogs. GrouperEnter the source file name and scan the OBJ file to see what materials we have to work with. For this example I've grouped the textures like this:
If you're using a Victoria model you'll want to group the UpperEyebrows under the SkinHead group. Here's why I'm grouping these the way I am:
That leaves just the cap, topcap2, cap_topcap and 1 groups for the Yann hair. To understand why I grouped these items this way you have to go back to Poser. In Poser I selected the YanHair prop then opened the Render/Materials dialog. If you step through the materials you'll find that they're mapped like this:
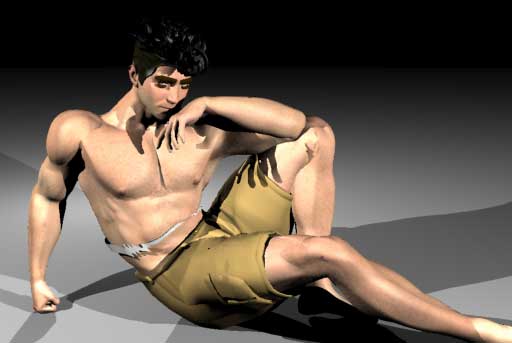
The only difference between 1, 2, 3 and 4 is the texture strength. The maps are the same so I took a shortcut and mapped them into one group. The hair prop you are using will almost certainly be simpler than this but the process is the same. Look at the materials as they're assigned in Poser and group textures that use like maps together. Once the texture aliasing map is complete, convert the OBJ file. CarraraIn Carrara I setup a ground plane, some lights and some cameras. You can download the basic Carrara file here. The only two important things I've done in this default file are; in the Assemble room I selected the scene object and set the ambient brightness to zero. I've also gone to the Render room and checked "Light Through Transparency". With those settings, I imported the grouped OBJ file and ran a quick render.
Pretty good for a raw import from an OBJ file. Now, let's make it better. Copyright © 2002 - CJC, all rights reserved |